Close Menu
  • Publishers
  • Advertisers
  • Help Center
  • Let’s meet!
  • Contact
  • English
    • English
    • Русский
What's Hot

The Power of Paid Ads in Adult Content

08.08.2026

5 Best Ad Networks for Affiliate Marketers, Compared

07.08.2026

ClickFlare Ad Tracking: Optimizing Your Mondiad Campaigns in 2026 

03.08.2026
Facebook X (Twitter) Instagram YouTube Telegram
Mondiad BlogMondiad Blog
  • Publishers
  • Advertisers
  • Help Center
  • Let’s meet!
  • Contact
  • English
    • English
    • Русский
Sign Up
Mondiad BlogMondiad Blog
Home»Help & Support»Mondiad Ad Monetization Code Setup – Blogger Tutorial
Help & Support

Mondiad Ad Monetization Code Setup – Blogger Tutorial

By Oana Vasarhelyi25.04.20253 Mins Read
Share Facebook Twitter LinkedIn Telegram Email

Learn how to integrate your Mondiad ad codes into your Blogger website and start your journey with ad monetization.


Contents hide
1 Preparations
2 Method 1: Update the HTML Code
3 Method 2: Upload Code via a Gadget
4 Disclaimer
5 Mondiad Ad Code Recommendations:

Preparations

  1. Submitted your website
  2. Created your ad zone(s) & ad display parameters
Mondiad ad code integration
Mondiad ad code Blogger setup

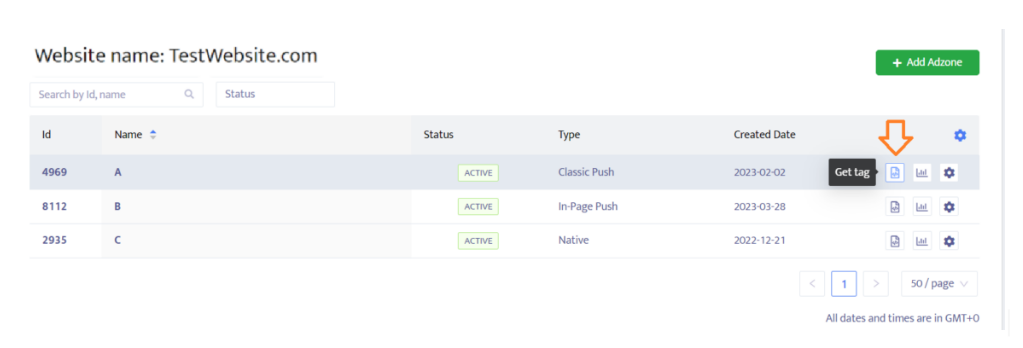
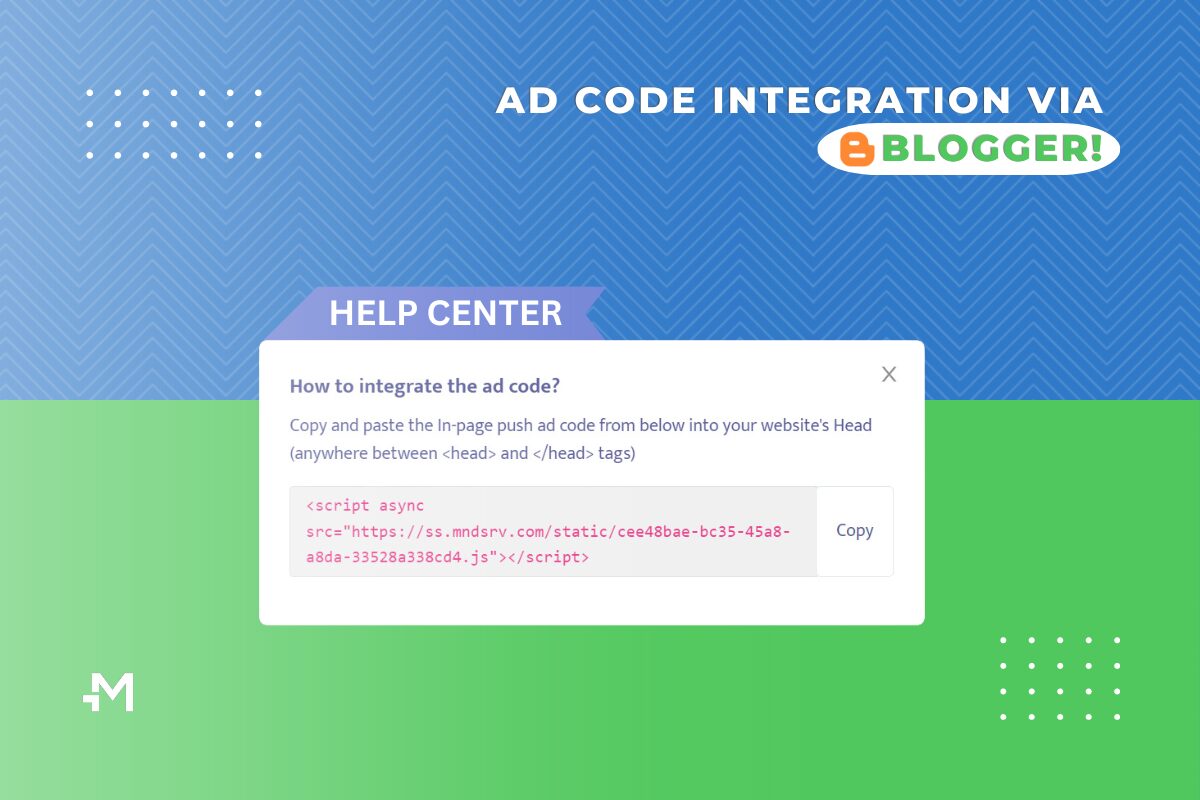
After you submit your website, set up your ad zones and ad display parameters, you’ll need to copy and paste the Mondiad-generated ad script to your website.


Method 1: Update the HTML Code

Insert the Mondiad ad code via editing HTML code in the theme.

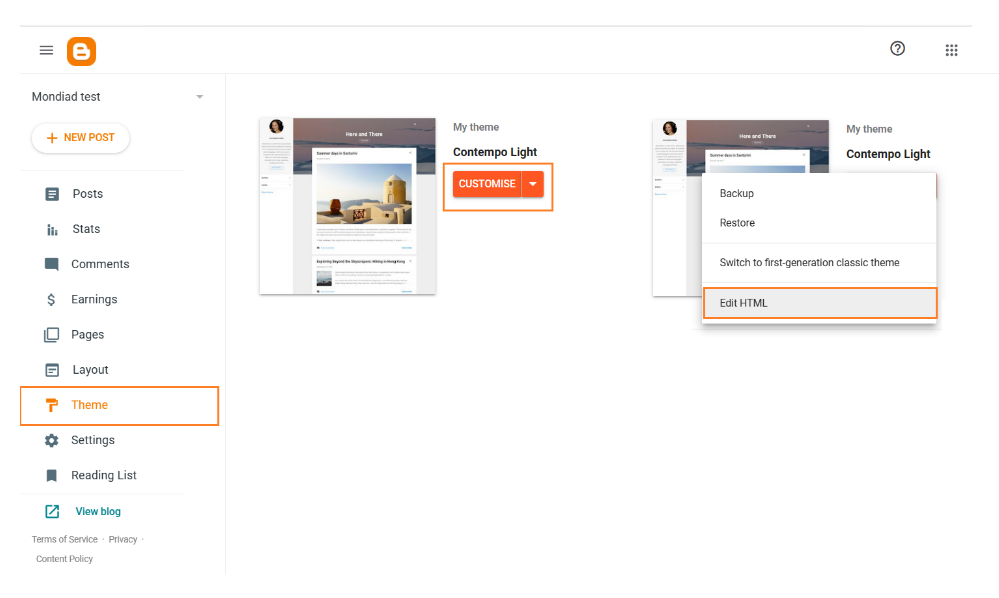
Sign in to your Blogspot account and head over to your website theme settings, namely the “Theme” section in the left menu.

Here, head over to your active theme, click on CUSTOMIZE then click on Edit HTML.
Mondiad ad code integration
Mondiad ad code Blogger setup

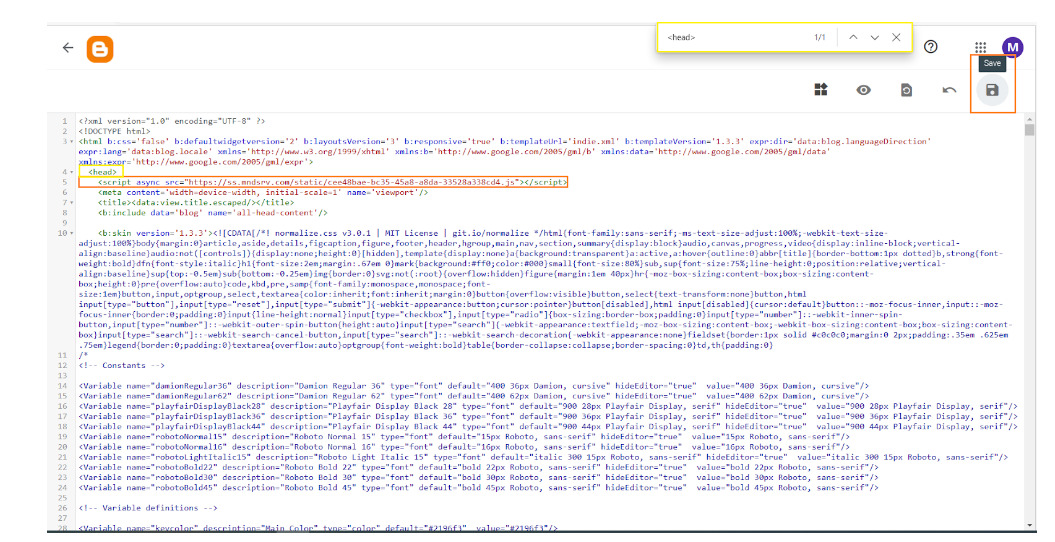
Now, you should see the entire code of your website. 

To navigate and find the spot to place your Mondiad ad code easier, use the CTRL + F command on your keyboard to look for the <head> tag.
Mondiad ad code integration
Mondiad ad code Blogger setup

Now insert the ad code from your Mondiad account into the instructed place: your website’s Head (anywhere between <head> and </head> tags);

When you are done, click Save Theme and check out your website.


Method 2: Upload Code via a Gadget

Insert the Mondiad ad code using a HTML/JavaScript gadget.

Sign in to your Blogger/Blogspot account and head over to your website theme settings, namely the “Layout”tab in the left menu.  Here, you can see the structure of your website.

Now, choose the area you want to place your ads then click on the “Add a gadget” button in the section of your choice.

From the gadget list, choose HTML/JavaScript.
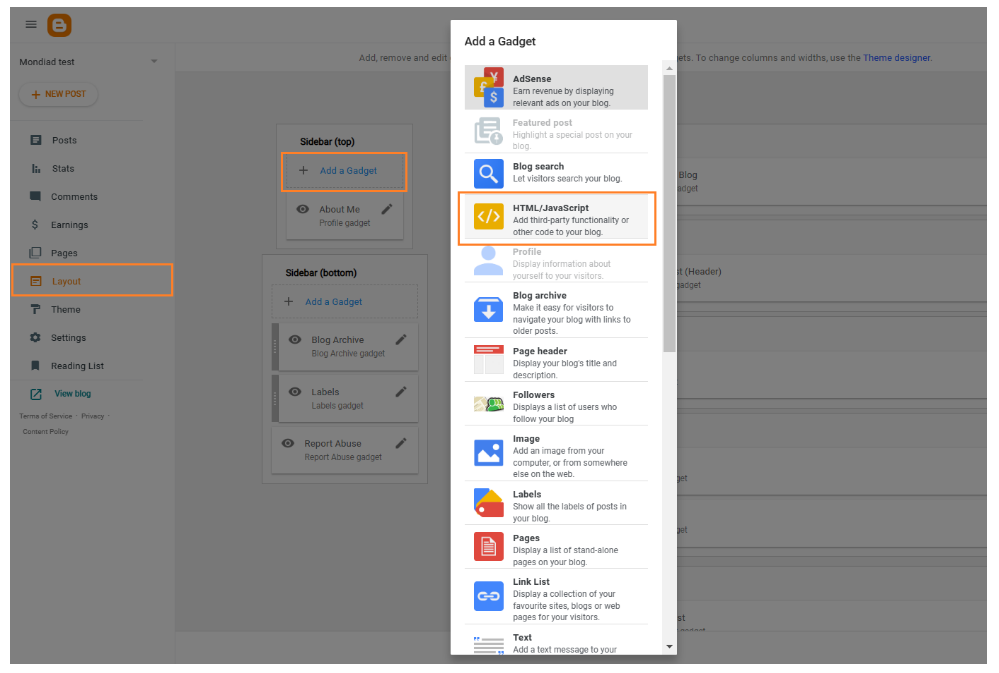
Mondiad ad code Blogger setup

Here, insert your Mondiad ad code into the body section and remember to leave the title section empty.
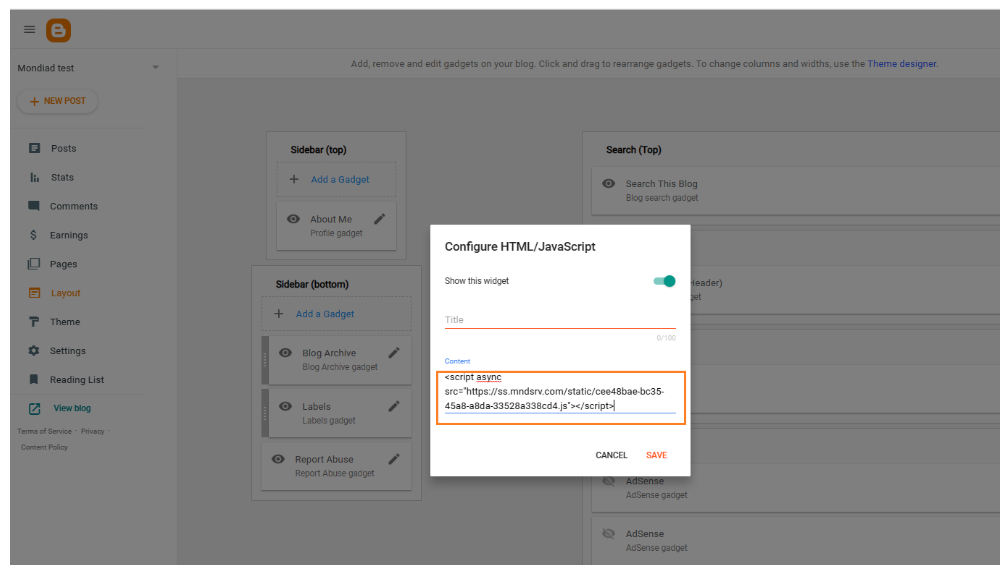
Mondiad ad code Blogger setup

Click the “Save” button and you are done. You can now check your website.


Disclaimer

⚠️Notice that for each ad format(classic push, in-page push, native), there are slightly different integration instructions. Make sure you are implementing all the steps, as instructed.
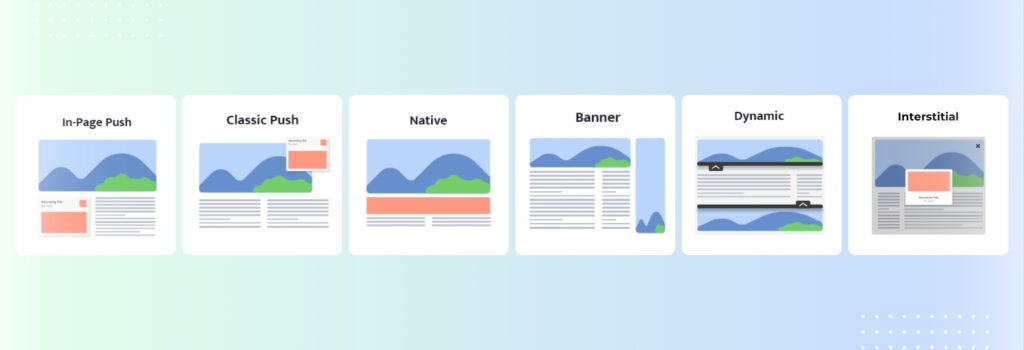
Mondiad ad formats
Mondiad ad formats
  • For the Classic Push ad code, you’ll also need to download and insert another Mondiad file into the root of your website.
  • For Native ads, keep in mind that there are two codes: The Native ad delivery code & The Element code.

Follow the instructions in the Mondiad pop-up window to learn how to integrate the ad code into your website or check out this Help Center article on how to do it.


Mondiad Ad Code Recommendations:

  • Don’t oversaturate your website with ads for profit but keep a decent ratio of ads on your website pages.
  • Whenever you’re adding a new ad code, preview it and ensure it blends with the website layout.
  • Customize your ad zone settings ad they are a very game-changing element. Make sure you are configuring your ad zone settings. In Mondiad you can customize the widget position, display delay, timeout after ad click, timeout after ad close (push ads) and title, columns, rows, backgrounds color, layout, creative ratio, effects and many more elements(native ads).
  • For the ads to appear on your website, don’t forget to check if your website is approved in the Mondiad platform. After submitting a website, it takes about less than one hour to be approved(working days).

HelpCenter publisher
Previous ArticleBanner Ad Monetization: Complete Guide
Next Article Top Performing Websites For Ad Monetization
Oana Vasarhelyi
  • LinkedIn

Oana Vasarhelyi is a performance marketing specialist at Mondiad, the global advertising network, where she has analyzed affiliate campaigns and authored advertiser-facing content since 2022.Her work draws on Mondiad's cross-vertical network data, such as spanning sweepstakes, dating, finance, iGaming, nutra, and app install offers across Tier 1–3 GEOs, to turn campaign-level performance patterns into practical guidance for affiliate marketers.A linguist by training turned ad-tech practitioner, she brings a translator's discipline to an industry that often buries fundamentals under jargon. Off the clock, she's a reader, gamer, and sketcher.

Related Posts

Publisher Monetization

5 Monetization Myths You Can’t Afford to Believe

28.07.2026
Online Advertising

Step Up Your Ad Game With Native Advertising!

28.07.2026
Help & Support

Improve Ad Targeting with Mondiad’s Traffic Audiences!

19.07.2026
Contents hide
1 Preparations
2 Method 1: Update the HTML Code
3 Method 2: Upload Code via a Gadget
4 Disclaimer
5 Mondiad Ad Code Recommendations:

Get 15% deposit bonus

Register now and you will get a 15% deposit bonus available for new users.

Register
Categories
  • Advertising Insights
  • Case Studies
  • Comparisons
  • Help & Support
  • Online Advertising
  • Publisher Monetization
PopCash.net
Facebook X (Twitter) Instagram YouTube LinkedIn
  • Home
  • About Us
  • Contact
  • Online Advertising
  • Publisher Monetization
  • Advertising Insights
  • Comparisons
  • Case Studies
© 2020-2026 Mondiad. All rights reserved.

Type above and press Enter to search. Press Esc to cancel.